Step 1 - Open the work item and enter the "Identify Risk" tab
Note: the tabs will be visible only for work item types chosen in the configuration setup when configuring Nooga Risk for the project.
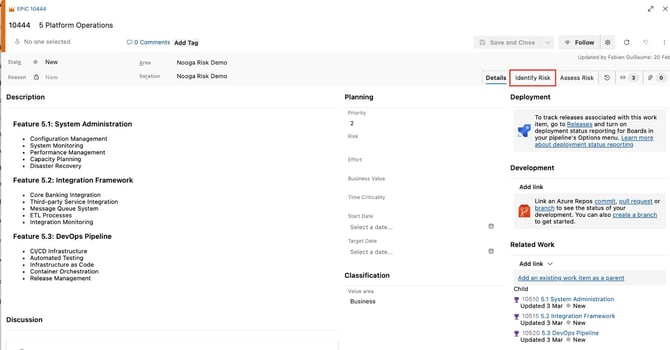
Step 2 - Click the blue "Identify Risks" button
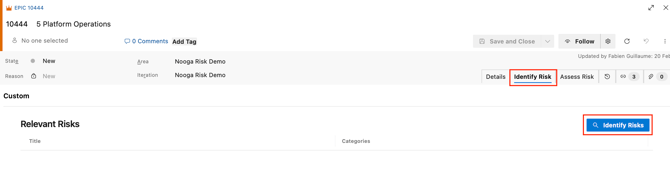
Image: open up register with existing risks
Step 3 - Select relevant existing Risks from your risk register and link to your work item

Image: link existing risks to the work item
Use AI:- Let AI assist you in identifying risks that may be relevant for you to assess within the scope of your work item, click "Find related risks"
- You must manually select AI-identified risks by checking the boxes for those you find relevant.
- Click the blue button "Select risks"
Manual linking:
- You may also select risk descriptions from the comprehensive risk register, open up the filter bar to search for risks by, for example, free text or category
- Link selected risks by clicking the tick-boxes
- Click the blue button "Select risks"

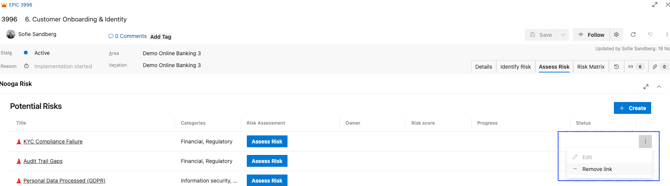
Deselect/remove linked Risk Descriptions:
-
It is possible to deselect/remove links to Risk Descriptions that has not yet been assessed in the "Assess Risk" tab. Click the three dots on your right and choose to "Remove link" (keep in mind that this is not possible once a Risk Assessment has been created).
Create new risks:
- If you want to create a new risk you can do that in the "Assess Risk" tab
If you want to create and add a new Risk Description you find the "+Create" button in the "Assess Risk" tab.

-
Title – Give the risk a clear, concise name.
-
Description – Explain what the risk is, why it might occur, and what the potential effect could be.
-
Categories – Select one or more categories that best describe the risk, the derived threshold level will be based by category.
- Click "Create" if you want to assess the risk at a later stage. A new Risk Description will be created and linked to the work item and the "Assess Risk" button will be visible.
- Click "Next" to add links to other work items if applicable
- Click "Next" again and choose which Risk Assessment you like to assess
- Assign owner and assess the risk by filling in the scores for the Risk Assessment.
Note that you can select one or several risks to assess
Video: create a new risk and assess it
How Risk Descriptions and Risk Assessments Work Together
-
Risk Description work items define the risk.
They hold the title, description, and category. Each Risk Description is stored in the project's risk register and can be reused across multiple contexts (work items in AzureDevOps) via Related links.
-
Risk Assessment work items represent a risk evaluated in a specific context (work item in Azure DevOps). Each Risk Assessment is linked to one Risk Description and one context work item via Related links (e.g. Epic, Feature, User Story, PI Objective), and holds the risk owner, likelihood/consequence scores, and resulting risk score.